
A few years ago I blogged about creating an Adobe AIR app that would allow me to drag and drop images on it and automatically upload them to my blog server. The backend code would store the image and create a thumbnail. The WordPress plugin would display the images on the sidebar.
Since visiting AWS re:Invent, I started looking for a project to play around with some AWS services and decided it was time to create a new version of the “uploader”. The stack I used:
- WordPress plugin
- PHP
- JS
- S3 to store the images and thumbnails
- SQS to get notified when the thumbnails are created
- Lambda to generate thumbnails after an image is uploaded to S3
Concept
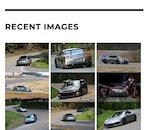
A WordPress plugin is configured to run on the sidebar. For a guest user, only the functionality to list images is loaded. This will make an API call to load all objects from the S3 bucket. In JS, we parse through all objects and display the newest x thumbnail images on the screen. Clicking on the image will load the original sized version.
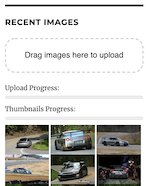
The experience for the admin user is a bit different. That user sees a drag and drop area above the thumbnails. Upon dropping images on that spot, two progress bars are displayed. One shows the progress of images being uploaded to S3. The other shows the progress of thumbnails begin generated.
Guest View:
Admin View:

Uploading:
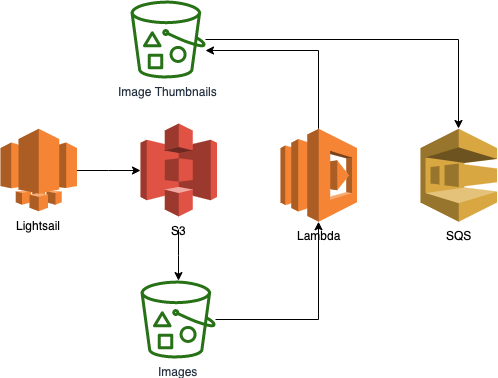
The Process
High level, this is what is happening:
- Images are dropped on the WordPress plugin’s drag and drop area.
- A call is made to upload those images to an S3 bucket using the AWS JS SDK.
- The S3 bucket receives the image and when it’s completed, a Lambda function is triggered.
- The Lambda function creates a thumbnail image and puts it in the thumbnail bucket.
- When the thumbnail is fully received, that S3 bucket sends SQS a message with information about that image.
- JS keeps checking back with SQS to check on completed images and when all images are done, resets the display and shows the new thumbnails.
Setup
S3
The first part of the process is to create two S3 buckets: one for the original sized images and the other for the thumbnails. The trickiest part here is to get permissions correct in AWS. We’ll need to attach the right policies. A lot of how I learned to configure this and how I got this to work comes from a hands-on training class from Quiklabs – Introduction to AWS Lambda.
Lambda
The purpose of the Lambda is to resize an uploaded image and store it in the thumbnail bucket.
SQS
We use SQS to track what thumbnails have been generated. When the Lambda is done, it sends a message to the SQS queue to let it know it’s finished.
WordPress Plugin
Nothing fancy here, just a WordPress plugin that shows recent images based on an API call to the S3 thumbnail bucket. It has a widget setup page to store the AWS connection strings.
Here is the repo: https://github.com/joeyrivera/wp-s3-images
Steps To Make This Happen
- Setup S3
- create two buckets
- setup permissions
- Create Lambda
- configure the resize script
- set it as a triggered event on the S3 bucket
- setup permissions
- Setup SQS
- add event to receive from S3 resize bucket
- setup permissions
- Create WordPress plugin
- create widget form
- create settings page
- drag and drop
Conclusion
If you want more details, leave a comment and I’ll do my best to answer your question or update this post with more.
Resources
WordPress Plugins
- https://developer.wordpress.org/themes/basics/including-css-javascript/
- https://wordpress.org/support/article/debugging-in-wordpress/
Drag and Drop JS
- https://developer.mozilla.org/en-US/docs/Web/API/HTML_Drag_and_Drop_API/File_drag_and_drop
- https://www.smashingmagazine.com/2018/01/drag-drop-file-uploader-vanilla-js/
AWS
- https://docs.aws.amazon.com/AWSJavaScriptSDK/latest/AWS/S3.html
- https://docs.aws.amazon.com/AWSJavaScriptSDK/latest/AWS/SQS.html
- https://docs.aws.amazon.com/AmazonS3/latest/user-guide/enable-event-notifications.html
- https://www.tothenew.com/blog/configuring-sns-notifications-for-s3-put-object-event-operation/
- https://stackoverflow.com/questions/19176926/how-to-make-all-objects-in-aws-s3-bucket-public-by-default
- https://docs.aws.amazon.com/sdk-for-javascript/v2/developer-guide/s3-example-photo-album.html
- https://run.qwiklabs.com/focuses/8613?parent=catalog
- https://docs.aws.amazon.com/AmazonS3/latest/user-guide/enable-event-notifications.html#enable-event-notifications-how-to
- https://aws.amazon.com/blogs/aws/new-for-aws-lambda-environment-variables-and-serverless-application-model/